Another shot of the main parts with the feeder (the correct name for the back assembly) in two.
Keep the nuts and bolts from the feeder safe, because I don't think there are spares in the kit.
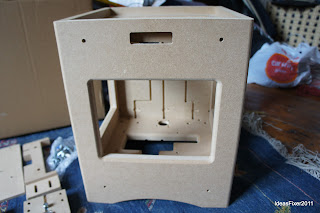
The main body.
 |
| Back |
 |
| Left side |
 |
| Front |
 |
| Right |
 |
| Bottom |
 |
| Top looking in toward the back panel |
Virtually all of the rounded edges are a little rough and take no more than a few strokes with some fine glass paper to smooth.
 |
| Z Axis Stepper Fixing |
Another picture of the joints of the main body. I'm wearing gloves because unusually for the UK in October it's a stifling 29°C with no breeze and I don't want to get sweat and grease on the the MDF. Not that I suffer from this, I normally smell of roses. :)
It maybe a good idea anyway, depending on your climate because MDF has a tendancy to suck up moisture and oils (and paint) like a sponge particularly on the edges . Removing these stains requires more sanding to remove (unneccesary work) so the paint can adhere properly.
I had a visitor while I was working and thought it a shame not to include this picture of Murphy, the smooth haired fox terrier.
 |
| Hello Murphy! |
SumPod Guinea Pig signing off.


Thanks for the pictures and the commentary. Have you picked a color scheme yet?
ReplyDeleteBrilliant white. I'm glad you like the post.
ReplyDelete